Wednesday, November 29, 2006
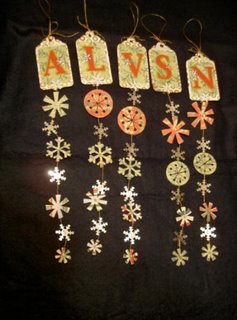
Basic Greyish Card Exchange - Snowflake Ornaments

Saturday, November 25, 2006
WIP & Tord Boontje Inspiration
 Since I love the dishes, I thought that I might find fun table linens,too. But, they did not do anything more than red favric. So, I tried to forget about it, but my brain would not obey. There was a nagging in the back of my mind, like an overstimulated, sugar-high child in the mall, crying for a table decoration that matched the garland. So, I finally gave in. I used the garland as inspiration and am making this table runner. This section looks good, but I have more to go. I put wonderunder, an iron on adhesive, on the back of white felt. Then I drew on the design. It is about a foot tall. After I drew it on there, I thought, "I must be CRAZY! Look at what amount of work it would take to cut that all out!" However, on Friday a friend came over to make boxes like the ones I have posted below. She had a blast. She does not consider herself crafty, and making the boxes was like watching magic appear, for her. So, I sat with her for about nine hours, explaining what she needed to do and cutting away when she was busy. I must say, I do think I will love it when I am done. I had thought of making one for someone else, but I think one will have to be enough! When I am done, it will be adhered to blue fabric and be embellished a bit. That will follow soon.
What are you working on?
Thanksgiving

Tuesday, November 21, 2006
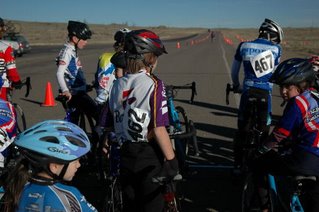
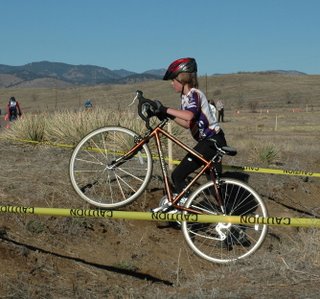
Cyclocross Racing- Red Rocks Velo Series

Friday, November 17, 2006
Thanksgiving Decoration
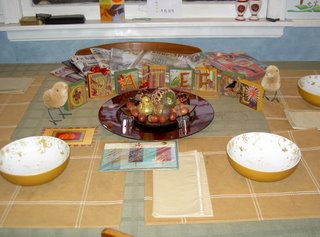 Here's a shot of my Thanksgiving table. It looks pretty humble in this photo. My favorite thing is the acorns on the plate. Sorry you can't see them very well in the photo. The bowls are from the Tord Bonntje collection that they are selling at Target. I got the gold bowls to go with the Thanksgiving colors. I am hoping to add some of the plates for Christmas. Yesterday my the brakes on my vehicle went out on a major road (Yikes! It is amazing that I did not hit anyone or anything, and that the kids were not with me), so I may not be able to get them. Time will tell. Either way, the bowls are a lot of fun!
Thanksgiving Swap Box
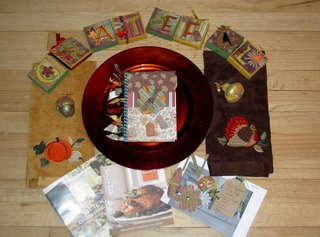 A friend and I love to send each other holiday boxes. They are really preholiday boxes of good stuff because they contain stuff to decorate with. Her box arrived first. I was so excited, that I took it all apart before I took a photo of it. This, however, is what I sent her. It has some really fun stuff. On the towels are two small, really cool bells. One looks like an acorn and the other looks like some sort of squash. I gave her a set of blocks, like the ones posted here. The plate was great find. It came from great shop in an upscale mall here in Cherry Creek. It has a lustre to it, something like an abalone shell. The book in the middle is a Thankful book. My idea is to record what we are each thankful for each year. My life has been such lately, that it is good to remember all that we are blessed with. Lives change or end drastically and suddenly sometimes. Also, it will be fun to see how it changes over the years. I also cut out all of the items need to make name cards, but left that for her or her kids to do. Finally, I included Thanksgiving guides I got from Sur La Table and William Somona. I will try to be better about posting what she sends me next time.
Wednesday, November 15, 2006
Thinking about the Holidays - Brain Sieze!
Anyhow, right now my brain is siezed on two topics - what to cook for Thanksgiving and how will I decorate for Christmas.
You see, each year I like to challenge myself to come up with some fun new things to serve. Here's this year's find. The title is a bit silly, but the dish is WONDERFUL - especially if you have some vegetarians to feed. My husband loved this so much that he ate a full third of it and says that he would have loved spinach if his Mom had prepared it like this. One of the best things about this recipe is the speed in which it can be made, and how it smells.
Magic Circle Spinach Ring (Mine was a rectangle spinach pastry)
1 med. bag of Spinach, frozen type, thawed and drained/squeezed
1 # Swiss Cheese - grated
2 pks. Pillsbury Crescent Roll dough (the kind in the tube that you open)
1 egg
Seasoning to taste - salt, pepper, garlic, dried onion, garlic, etc.
*I am considering adding pine nuts and marinated artichoke hearts to my next spinach pasry.
Preheat your oven to 350 degrees.
Mix the spinach, egg and seasonings. Add in the grated cheese.
Unwrap the crescent rolls, form a start on an ungreased baking sheet (I was short on time so I made two rectangles instead). Mold/press the center parts of the pastry together so that it will hold the spinach mixture. Spread it out evenly and then fold over the pastry so that the spinach mixture is completely covered. Bake 30-45 minutes, or until golden brown. Let sit for 15 minutes before serving. It is handy to slice it up before serving. This dish travels well.
You can be creative and add other things, like chicken, jack cheese and green chiles, etc.
Enjoy!
Now, the other thing my brain is busy with is redesigning how I decorate one of the rooms in our home. In the past it has been a mix of the stuff we have. This year I might have to be a bit more stylish about it. I'd like to make it blue and white. I have some wonderful pop-up books and I scored some of those wonderful garland by Tord Boontje that they are selling at Target this season. I was really hoping that there would be some matching linens and dishes. This room is our old living & dinning room space. I was able to get four of the gold and white bowls. They go with my Thanksgiving table set up (I will post a picture of that soon). Next, I want to get some fo the plates. They are white, gold, red and burgandy. Okay, so the whole blue and white concept will have to be a bit flexible. I want to find a way to get the paper cut (Tord and pop-up book concept) thing going. I want to hang some snowflakes in the windows. I want to find some white or silver reindeer, etc. I also am in desperate want of a blue and white table runner. The one I have in my head would be made of white and blue wool felt. The design would be something like the Tord garland made of wool, with a few small beads, tiny crystals, or the like. This has sent me on a quest to find the wool felt. With so many great quilting stores in Denver, you'd think I could find some, but alas, I have not. Well, I will simply have to continue the search...
Monday, November 13, 2006

This is a gift that I made for a friend of mine. This way I know it is not something she already has. The letters are made of chipboard. Most of them come from the Lil' Davis company. I like the fact that you can use the positive and negative spaces from the cut-outs. They were originally some other pattern, black with white polka dots. I simply covered them with paper that I liked. Some letters are covered with art glitter (extra small, fancy glitter). The letters are stuck on with the large glue dots so that they are a bit 3D. This all fits in a frame intended for a panoramic photo. I painted it to match. The photo of my friend is on a translucent tag that came from a scrapbooking company, Heidi Grace, I think. It could have just as easily been on a paper tag. Part of the fun of making these is thinking about the person as I am making their name on the picture.

This is from a series of cards I did for some of the people I work for. They are individual notes that I wrote to them pointing out what I appreciate and admire about each of them. I just love the spiral paperclips. I am sure that they will become one of the signature items I add to a lot of my work. On the tags I used a special pen and wrote out the person's name in a fancy manner.
Thursday, November 09, 2006
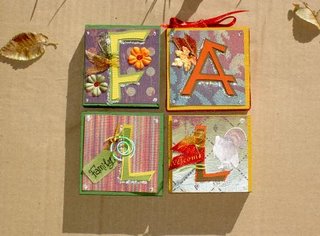
These are the newest elements of my Thanksgiving display. They are made from 3"x3"x1" wooden blocks. They could be made from paper mache blocks just as easily. If you wanted to make them with paper mache, I would suggest adding a weight inside of the boxes to make them more stable. I cut 2" letters and their corresponding shadows out with my Cricut machine and the George and Basic Shapes cartridge that comes with the machine. I then cut 2 1/2" background papers, attaching them with 3m Photo Mount Spray Adhesive. Next, I planned out the letters and embellishements. Letters that did not have something attached to them were run through a xyron and adhered to the block. The others got embellishments, like ribbon and fun paper clips attached to them. Those were attached to the block using good bottle glue and a few glue dots. They were a lot of fun to make. I made one extra set for my dearest friend.
Monday, November 06, 2006
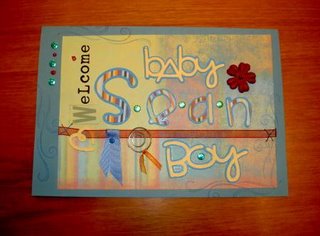
Welcome Baby Boys, Sean & Steven

Sunday, November 05, 2006
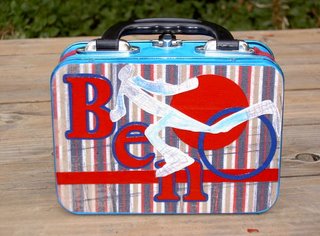
Ben's Altered Art Box
Friday, November 03, 2006
Altered Boxes - Natalie's Case
 I love to alter items. Right now I am crazy for boxes. Truth is, I love fun containers, and making them is a blast. This box started out nice enough, but I just had to alter it. I used a set of coordinated papers that I cut up and assembled in a collage like manner. Then I used my Cricut personal electronic cutter and the Mini Monograms cartridge to cut out the letters of her name. Next, I ran soft twill ribbon through my xyron machine and added to protect the corners. The twill is happy to bend on the edge and accomodate the curves without fussing. Then I covered it all in Mod Podge. After this was done, I added rhinestone bling and lots of fun ribbon.

