We had a blast at our annual Pumpkin Carving Party and Potluck. It was a smaller crowd this year since Ethan was out of town. Don came to our party to soak up some fun and have a bite to eat. We pressed him into service. He was happy to help Caroline.
The teen crowd stuffed themselves into the art room and had a wild time, as usual. Later they hung out in Ellie's room and enjoyed some tunes.
I always love this photo. We take one like it every year.
We had a younger crowd, too. Tim is probably the coolest little dude we know. He's cute, too.
Here's more cuties.
Toby thought he needed to check out what was going on. He wondered, was this something to eat?
Heather (my student teacher) and her boyfriend Roger craved up some lovely, artistic pumpkins.
These photos are fun, too. Aren't they a lovely family?
I made a Curried Pumpkin soup, as usual, but this year I switched up the recipe a bit. (I will be posting it soon). James offered a Pork and Cider stew that was amazing. I decided to have that for dinner, forsaking all of the other stuff. I offered to trade him my left overs for his. He graciously gave me the little that was left. He, like myself, kind of cooks by feel. He told me what was in the stew. I intend to figure it out and write out a recipe for it.
I also had a fun time putting together a playlist for the party. It is a sampling of lots of different styles of music.
I'd love to hear suggestions for more songs to add to this. Do you have some to share?
I love Halloween magazines. I keep them and put them out in a big, inviting pile each October. This year, in addition to my usual Martha Stewart issue, I also added the "Better Homes and Gardens Special Interest Publications Halloween Tricks and Treats 2010" issue.
When I came across the article on fun lawn silhouettes, I knew I had to make a few.
Lucky for me, my dear father-in-law, Don, likes to make things of wood. He agreed to help. I made cardboard stencils to trace.
He cut the shapes out and made the stakes. He even countersunk the area in the back where the flameless tea lights would go for the eyes. I spray painted the silhouettes black. Larr put them out in the garden for me. What a nice surprise.
You can make some, too. You can find the information about the article on line here.
I love, love, love Halloween. And I love carving pumpkins, too. Every year I want a more intricate design than I had the previous year. I am always bummed that they rot so fast. Then there is the issue of our squirrel and their cute, fluffy, twitchy tails. They are fierce about eat everything remotely edible in my yard, which always includes my pumpkins. As a purist, I have sworn away from the fake pumpkins, but was lured in this year. I succumbed! I caved! I wanted to have a pumpkin like Martha Stewart's and I wanted it to last more than a few days. I love the lacy ones and I am absolutely smitten by the porcupine (or are those hedgehog) pumpkins. I WANTED ONE! After reading the comments that go with her instructions I decided I would go the foam pumpkin route. One commenter said it took her 2.5 hours to get the lights in the holes (let's not even talk abut how long it took to get the holes poked out)and then many of them would not work because they were wet from have gone through the pumpkin - crazy making - I tell you!
I started out with visions of porcupine pumpkins dancing in my head (imagine Danny Elfman of "Nightmare Before Christmas," music playing lightly in the background). But those visions were soon dashed - no, shattered. I had a steep fake pumpkin carving learning curve ahead. Here's what I learned: * The foam is the thinnest in the very middle section of the pumpkin. It is very easy to crack, or even break pieces off. I started my design at the top of the pumpkin and moved down. That was a mistake. Start in the middle while that section still has uninterrupted support around it.
* You will find that the pumpkins were made as two parts that were glued together. Those sections where the halves were glued together are super hard to cut out. You are better off avoiding them by planning your design accordingly.
* Brass or cooper tubing makes great shape cutters. Just be sure to wear leather gloves unless you relish giving yourself pressure blisters from poking out so many holes.
* It is fun to add glittery swirls on the surface. Fabric paint works really well to adhere to both the fake pumpkin and the glitter.
* No matter what you do, it seems nei impossible to get the lights to stay sticking out of the holes. Neither glue nor duct tape worked so I had to give up on that idea.
* Strings of holiday lights seem to heat up really fast if left in an untidy, orgy type fashion in an enclosed space. Seriously folks, I am pretty sure it would become a fire hazard very quickly.
* The best way to light up the inside if you are using a string of holiday lights is to wind them around a very small jar (like a spice jar), being sure to secure them in place with tape ( I didn't even need the duct tape for this bad boy!)
* Be sure to cut a hole in the bottom of the pumpkin that is large enough to fit the jar with the lights wrapped around it. Forget about having any hope of reattaching the bottom cut out piece and having it work like a door. I tried and I was denied!
* Try to be flexible, let go of your grand vision, embracing what ever lovely creation you devise - after all, only you know what your exact vision was.
Here's to Halloween fun and beauty - thanks to a tacky but useful fake pumpkin, fabric paint, glitter, a spice jar, some holiday lights and a little tape.
Ethan's Scoutmaster, Gary, is a wonderful guy and just the kind of mentor every boy should have. As a small token of thanks for all that he does for my boy, I made him a hat. This is not just any run-of-the-mill hat. Oh no, it is a very special one made from an Alpaca fleece from the Lonesome Stone Alpaca farm in Grandby, Colorado. My friend Laura and I visited the farm about two springs ago. The animals were lovely. We got to view the entire process from dirty, stick infested fleece to luscious yarn. It is a special bit of yarn. Gary needed an extra warm hat and so it seemed to be a perfect match. I so loved knitting it up. I'd stop from time to time to "pet" the wool and enjoy the way the hat felt. I was even tempted to keep it since I like how it feels so much, but was happy to give it to him once I saw it on his head. I can always get another skein of yarn from them, if I feel the need.
Part of what makes this hat special is that the ribbing is doubled over, making your ears toasty warm and the fit a bit closer. It is a cool design.
Here's the pattern as was dictated to me over the phone by Aunt Lynne some years ago:
Cast on 60 stitches onto the size 7 circular needles. R1 - knit R2 -join the ends, being careful to not develop a twist in the yarn and knit.Knit in the round.
Ribbing - Do the following ribbing pattern until the ribbing section of your hat is as long as you would like it to be. I made mine 1.5 " *K2,P2* (60) (If you want to make a larger hat, be sure to increase the cast on in multiples of 4 so that you end up with an even amounts of knitted and purled sections.) Next row - Purl Now, switch back to the *k2, P2* (60) until you have the same number of rows of ribbing as the previous part. This means you will end up with an extra long ribbed section with a purled row in the middle of it. To complete the ribbed section fold the ribbing up so that the purled row is now the bottom of the ribbing (the purled row helps ensure that the folding up of the ribbing is equal all the way around). Make use that the ribbing sections are matching up properly. Now we get to the picky part. You need to join the two parts of the ribbing together. You do this by slipping your left needle into the stitch from the cast on that corresponds with the correct part of the upper ribbing. Knit these together. This will kind of feel like a k2t in that you are knitting through two stitches. Continue to do this until the entire rib section is joined together. Knit 1 more row.
Stockinette/hat section:
R1 - k with the size 7 needles. Place marker. (60) R2 - Switch to the size 9 or 10 needles and *k10, inc1* (66) Continue working the stockinette stitch until your hat is almost as long as you would like it. I generally have my hat measure 7.5" from the end of the ribbing to the point where I begin the decreasing.
Begin the decreasing: R1 - *K11, place marker* (66) R2 - *k2tog, K 10* (60) R3 - Knit (60) R4 - *k2tog, K 9* R5 - Knit (54) R6 - *k2tog, K 8* (48) R7 - *k2tog, K 7* R8 - *k2tog, K 6* Switch to the size 7 needles (use the circular or the DPN, using the DPN when the circular becomes too large for your project) R9 - *k2tog, K 5* Continue in this manner until there are 6-8 stitches left on your needles. Cut off a long tail and weave it through all the remaining stitches. Pull tight to close top, slipping the tail through the hole at the very end. Weave the tail ends to finish.
Friday Ethan had two wisdom teeth pulled out. We had hoped that it could wait until November as Ethan is going away for a week very soon, but they were causing trouble, so out they went. The proceedure went quicker than expected. They gave deposited the offending teeth into a small pouch and sent them home with him, just as he had requested. I was grossed out as they still had small bits of his red, bloody flesh attached. He was in a good bit of pain the first day. He kept puking and then dry heaving, so we could not keep any pain medication in his system. By Saturday he could tolerate water, Jello and Loaded Baked Potato soup. By Sunday we was still puffy and sore, but in good enough spirits to bug his sister. We took that pesky sign to mean that he is on the mend.
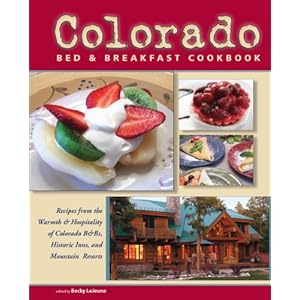
Right after we showed up they gave Ethan a sleeping pill and sent him to a couch in a quiet room. I followed with my knitting in tow. But then I spied the cookbooks. I am a sucker for cookbooks, so I had to check them out, of course. After a while they came to move him into the dentist's chair. I continued to sit, read and copy down a few recipes. They all came from Colorado Bed & Breakfast Cookbook by Carol Faino and Doreen Hazledine.Here are a few that caught my eye enough to spend the time copying them down: Pumpkin Granola Pancakes
2 cups Biscuit Mix (like Bisquick) 2 TBL. Brown Sugar 2 tea. Cinnamon, ground 1 tea. Allspice, ground 12 oz Evaporated Milk 1/2 cup Canned Pumpkin (not the pumpkin pie filling in a can!) 2 TBL Oil 2 Eggs 1 tea. Vanilla Extract 1/2 -3/4 cup Granola
In a large bowl mix the biscuit mix, brown sugar, cinnamon and the allspice. In a seperate bowl mix the evaporated milk, canned pumpkin, oil, eggs and vanilla. Stir until well combined and the eggs are incorporated. Gently mix this in with the dry ingredients.
Butter a hot skillet. Add the pancake mix to make the size and shape of desired pancakes. Sprinkle 1 - 2 TBL of granola on top of each pancake. Flip the pancakes once bubble appear on the surface of the pancakes. Serve warm with butter and syrup.
Lacquered Citrus
2 cups sugar 1 TBL Lemon Juice 1 TBL Vanilla Extract 1/2 tea Cardamon Seeds, ground or 8 Caradmon Seeds, crushed 1 cup Water 2-3 Grapefruit 6 Oranges
In a small saucepan heat the sugar, lemon juice, vanilla extract, cardamon and water until the sugar dissolves, stirring often. Then turn the heat down and let the mixture simmer for 20 minutes.
Meanwhile, peel the fruit, removing as much of the white pith as possible. Cut the fruits into 1/2" discs and arrange on plates. Pour hot syrup on them and serve.
The unused flavored syrup lasts for a long time in a jar with a good lid.
Buttery Almond Tiles
Base: 2 1/2 cup Flour 1 TBL Baking Powder 3/4 tea Salt (omit if using salted butter) 1 1/2 cup Sugar 1/2 cup Butter 2 Eggs
Preheat the oven to 350 degrees.
Whisk together the flour, baking powder, salt and sugar. Blend in the butter and eggs. This will make a dry dough that you press into a 9" x 13" pan that has been lined with non-stick foil. Bake for 15-20 minutes, or until lightly browned.
Topping: 3/4 cup Almonds, sliced 1/2 cup Butter 3/4 cup Sugar 2 TBL Flour 2 TBL Milk 1 TBL Almond Extract 1 tea Vanilla Extract
Place the sliced almonds, butter, sugar, flour and milk in a sauce pan on medium heat until the sugar dissolves, stirring constantly. Bring to a boil. Next, carefully add in te almond and vanilla extracts, stirring gently to combine. Pour over the cookies once they have been removed from the oven. Spread out evenly and broil for 1 - 1 1/2 minutes, or until bubbly.
When we first moved into this house 17 years ago it had a wonderful, magical garden. Almost every year the very first crocus shows it purple head on Ellie's birthday. It is like a little gift. But, due to having kids, drought and grad. school, the original garden has dwindled. This summer I've started replanting it.
Last weekend, even though it was a balmy 80 degrees, I thought of next spring as I stood taking in the myriad of bulbs that could be planted. In the end I picked up lots of crocus, some dwarf iris and a number of different Alliums. I spent the late afternoon planting them in clusters, little groups of a variety of color and size. It made me smile to think about what it will look like as they peek through the snow during the cold, grey days of March.
[photos coming soon]
I have a wonderful student teacher this semester. Her name is Heather. I'm thrilled to have a chance to work with her. She has been with us since the beginning of the semester. I share her with Kassidy. On the first student contact day before our student showed up I gave her a silly present. First, I handed her a note and a bag of little presents.The note had clues and numbers. She was to read the note and pull out the numbered present in order to finish the sentence/idea. Here's what it was all about:
"In order to help you on your way to becoming a [1 a rock and star stickers]Rock Star Teacher, I've gathered a few things you'll need: I imagine that you'll [2 a timetracker planner] plan on makind it a hit, too. It'll be importnat to keep me [3 post-it notes] posted, and keep your stuff [4 stapler} together. There [5] will be basic stuff to learn. Somethings will need revisions [6 white out].I look forward to the highlights [7 highlighters] of your endeavor. You'll remember some of them forever. It is the start of a wonderful career. You'll do it with style [8 AHS Honor Society shirt] and spirit [9 AHS "Be the Change You Wish to See" shirt]. I'll do my best to help make sure you [10 ruler] rule! Good Luck! We are here to support you!
On the news front, I am happy and relieved that all of the Chilean miners who were trapped underground for 69 days are finally free. I was sort of captivated by the whole rescue process. I, like so many around the world,watched the live coverage from time to time. I was so impressed with the positive health and spirit of each miner as he broke free from the cage that brought him up from the rocky hell they were encased in for so long.
It was a lovely fall day yesterday. I had more time at home than expected since the kids did not race. Ethan was out at an Airsoft battle and Ellie had a bruised foot from when she ran Ethan around in the brand new, giant trash barrel that was delivered this week. (It was simply too inviting to not do it. Ethan deposited himself inside and Ellie ran him up and down the alley, barefoot. Ouch!) I decided to begin revamping the garden strip on the south end of my front yard. October is a great month to start perennial in Colorado as the weather is usually mostly mild enough for the plants to get established before going dormant for the winter. This means they will have a nice root system in place for next spring. Ellie and dug up the garden for a few hours. I also went to the garden center and picked out a bunch of spring bulbs. I am hoping to enlist Ethan to help me do the final bit of digging and removing unwanted plants. Today I will augment the soil with compost and water it in. This will allow me to get planting soon.
We also decided to have Grandma Gay and Grandpa Don over for dinner and a movie so I made French Onion soup and a nice Chuck Roast with Au Jus for dinner. We rounded the meal out with coleslaw, broccoli salad and Dove bars for dessert.
In recognition and observance of John Lennon's 70th birthday (if he was still alive) we watch "Pirate Radio." It is such a fun movie - we might just have to own it.
Finally, here's a bit of video inspiration. The Benjamin Lacombe pop-up was found on the Rag and Bone blog. I might ask for that book for Christmas. Ellie uncovered the Parkour Motion Reel was uncovered by Ellie while "stumbling" online. I hope you will find them enjoyable!
Benjamin Lacombe's Il Wthait Une Fois (Once Upon a Time)via Vimeo via Criacao
4 Onions, thinly sliced 6 pc. Bacon (optional, but nice. I used turkey bacon) 2 TBL. Butter 2 TBL. Olive Oil 1 TBL. Sugar 1 tea Salt 8 cups Beef Broth 1 pk. Au Jus Mix (optional, but very nice) 1 cup White Wine 1 1/2 TBL. Thyme (fresh is best, but dried will do) 4 Bay Leaves Gruyere or Swiss Cheese Grated Bagette (Italian, French, Puglies or Sour Dough - any dense bread with a nice crust)
Cook the bacon. Remove it from the heat and chop it into small pieces. Heat the oil and butter in a deep pan. Add onions and turn to coat with the oil/butter mixture. (You can use all oil or all butter if you like)cook on medium until they are browning nicely. Stir them occasionally for even browning. Stir in the sugar and salt, cooking more until the onions have caramelized (Mine took about 40 minutes)Sprinkle on the Au Jus powder mix, if using, and stir it in. Add the bacon back into the soup. Add the white wine. Add the beef broth and stir to deglaze the bottom of the pan. Add the thyme and bay leaves. Once the broth is hot, turn down the heat and let the soup simmer for a long time. The soups can be enjoyed at this time, but it will have a deeper flavor if you let it simmer for a long while. The simmering can be done on the stove, or in a crock pot.
Preheat the broiler. Slice the bread into 1" pieces. Place them on a cookie sheet and toast them on one side. (I am going to consider cutting my bread into cubes next time. I believe this will make it easier to eat.)
To assemble the soup: Place the hot soup in an oven proof bowl. Top the soup with a piece or two of toast. Add grated cheese on top of the bread. Broil until the cheese is melted and bubbly. Be sure to keep an eye on it as it can burn easily. Serve right away.
The soup keeps nicely in the refrigerator.
------- Tender Chuck Roast with Au Jus Gravy
1 Chuck Roast (Other types of roast would work nicely, too) 3 TBL Olive Oil 6 Garlic Cloves, peeled 1 TBL Rosemary (I used 4 large, fresh sprigs from my garden) Beef Broth 1-2 TBL Worcestershire Sauce
Heat the oil in the bottom of a dutch oven, pressure cooker or other thick, stout pan. Add the meat to brown it. Turn occasionally so that every side is browned. I usually let it brown for about 3-5 minutes per side. (Longer browning time for thicker pieces of meat. Turn carefully to avoid getting splattered with the hot oil.) Once the browning is done, add in the garlic cloves, enough broth to fill the pan half way (with half of the beef in broth and half of it above the broth). Add in the Worcestershire sauce and the rosemary. Cover and let simmer for a long time. If this is done in a crock pot, it will need to cook for 7-8 hours. If done in a dutch oven, place a piece of foil over the top before placing the lid. This will help create a more effective seal. It will need to cook for 4-6 hours at 350 in the oven. If you are using a pressure cooker, place the lid, bring the internal temperature up to high and then reduce the heat to medium low once the pressure is going and cook for 4 hours.
To serve, remove the meat ahead of time to slice. Add the meat back into the pan to keep warm until just before serving. Place the meat on a platter, serving the Au Jus gravy on the side.
Yesterday morning I awoke at 5:15 a.m. to the lovely sound of leaves rustling in the wind - the kind of wind that makes the leaves dance in sweeping swirls. The wind carried a gentle hint of the smell of autumn - that slightly wet smell of damp leaves and wet ground. The brilliant orange sun was just a peak as it blazed over the horizon on the east. I knew then that Fall had officially arrived. In defiance I wore a bright green dress that happened to match my lime green tote bag. It was striking enough to receive several comments. While I love the idea that fall has finally taken her turn on the stage, I am reluctant to dress my part as it is so swathed in muted, understated and muddy tones. Don't get me wrong. I love some of my fall and winter clothes, too, but they simply do not display who I am in the way that my colorful clothes do.
Last night, Mother Nature threw in another biggie, just in case we were not listening. As the kids were at bike practice the clouds, heavy, dark and a bit foreboding, cast a shadow on the ground. Just as we had nestled into our warm beds, with the window closed against the cool night air, she threw in a momentous thunder storm that lasted for hours. The wind whipped around the yard, the skies lit up with crackling lighting and the skies resounded the booming thunder. Soon after, hail join in the chorus, pelting the windows and the house with their little balls of ice. She means to be reckoned with.
This morning I wore a purple coat to work and tucked some socks into my sachel, a little gaurentee against the weather that might continue to be bold even after the afternoon has come and gone. It makes me think about what lovely soup I might have simmering on the stove top some time soon.
I love the changing of the seasons. Each time it is almost like a present to be anticipated, opened and delved into.
One recipe that I will enjoy again is from Naptime Chef:
Ham & Cheese Bread
1 ¾ c. all-purpose flour 2 t. baking powder 1 t. salt ¼ t. black pepper 3 large eggs 1/3 c. whole milk 1/3 c. olive oil 6 oz. baked ham, cut into ¼″ cubes 6 oz. Gruyere, coarsely grated Preheat oven to 350ºF. Butter a loaf pan generously with butter. In a large bowl, whisk flour with baking powder, salt and pepper. In a medium bowl lightly whisk the eggs, then whisk in the milk and olive oil. With a spatula, fold the wet ingredients into the dry until just mixed. Fold in ham and cheese. Pour batter into loaf pan and smooth the top. Bake for 40-50 minutes, or until a cake test comes out with a few crumbs attached. Cool loaf in the pan on a wire rack for 5 minutes. Then, turn it onto the rack and cool completely.
As the last remenates of all of the illnesses are nearly gone (reads- almost done with 10 days of med.s) the family is getting back to what we love to do together - bike racing. We spent the weekend up in Breckenridge and had a lovely time. We even picked up a few extra kids for the time we were there. The Frisco race series is one of our favorites. Ellie had a rough ride on Saturday as her breathing is still impacted by having been so sick for so long. I also think dehydration and altitude played a part, too. Altitude has an attitude when you are 4320 feet higher than you are used to. I was proud of her for giving it a go. Sunday was so much better. I think she was happy to find that she still has her technical skills. Now she just has to get the cardio lined up again. Still, she placed second both times. I was surprised when Ethan wanted to race on Saturday.As you can see here, he looks pretty happy. About a week ago (or so) he was injured playing football. He had a bad crash on his bike at the P4P ride on 8/28 and the injury was in the same spot. He raced through the pain, even with the injured rib sort of sticking out a bit. It was bad enough that he had a heating pad on it during our ride up. Nonetheless, he seemed to have fun and raced into second place.
To add to the fun we had Ariana and Stephen spend the weekend with us. It was a full house in our studio over at the Beaver Run Resort.