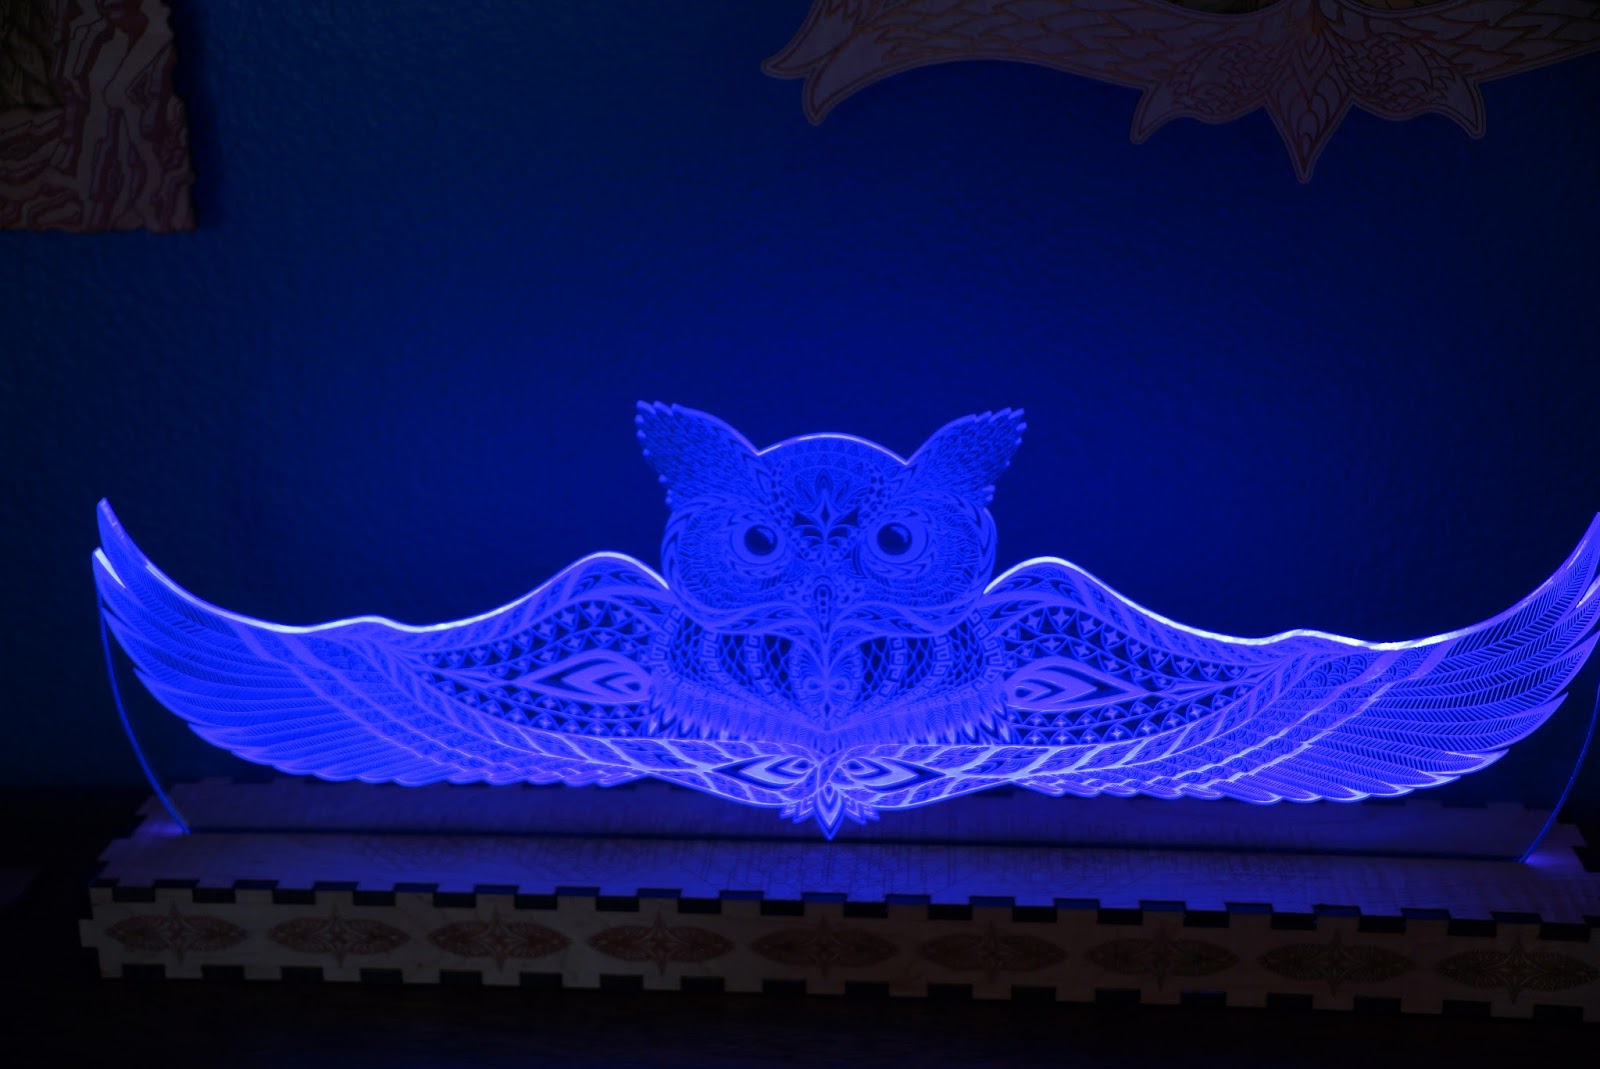
This fall is one of the most glorious ones that I can remember. I don't know if that is because it is in fact one of the most beautiful falls, or if I am just making a point to notice. Fall weather in Colorado can be bipolar. The year that Ethan was born, on Labor day in the very start of September, it snowed as we were bringing him home. I remember because I did not have the right clothes for him. In the past we would have already had some serious snow, but not so far this year, and I don't know when it will come. Other years, the first snow of any significance was on Halloween.
Either way, I made sure to get out in the fall air and enjoy the warmth of the sun on my skin, especially on my face.
On Saturday I went seeking artistic inspiration. I was a bit stuck on how to begin the castle that I must build in a few short weeks, so I thought talking to other artist might help.
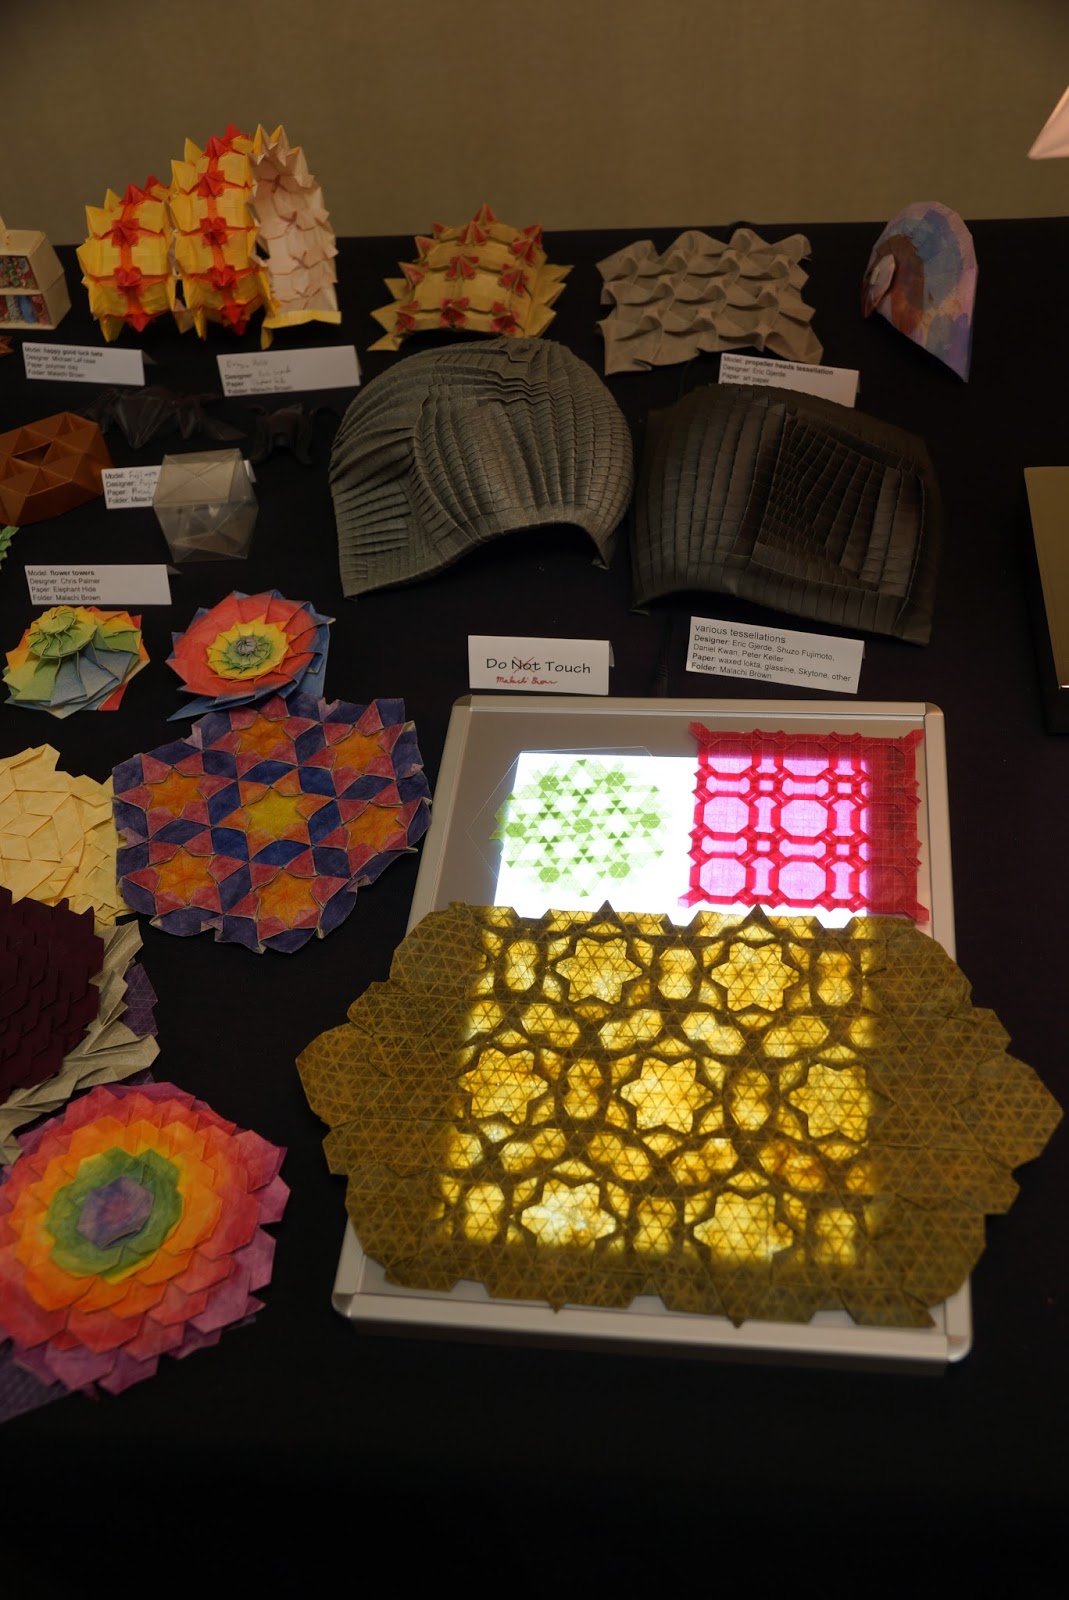
My first stop was at the Pacific Coast Origami conference, which was in a hotel in Boulder. The portions of the public exhibit and vendors was very small, but interesting and the people were very welcoming. I took a number of photos to show my students who like to give a go at origami
From there I set off to visit as may studios as I could fit in a day. It was the final day of the Boulder Open Studio event which takes place during the first two weekends of October. I have been before, but it had been years. I wanted to talk to other artists, I wanted to see what they were creating and I wanted to see how they organized their spaces. I had expected to be dazzled by a host of spacious rooms with great ventilation and windows or plexiglass garage doors that allowed the sun to stream in. I was surprised to find that many of the studios were in tiny, often dark, rented spaces. Each artist made his/her space very personalized and many of the spaces were inspiring, but I also went home feeling like the cozy set up that I have in a what used to be a spare bedroom, quite sufficient.
My favorite part was talking to the artists.
I first encountered Susan Douglass who is a retired geologist. She creates very moving sculptures from her retired vellium maps from places she has been to. The shapes of her sculptures imitate some natural feature, whether that be weather, rocks, water, etc. I loved how close I could get to them. She also does a series of painting about weather. The one I have below I think is an interpretation of snow.
Liz Quan has a studio next to Susan. Liz creates exquisite porcelain sculptures. Her studio and art made me wish that I had the patience to work with that stubborn clay. I could imagine myself sitting in the sun streaming from the window in her studio carving away at the beginnings of small clay pieces. Then I remembered that porcelain and I do not get along very well, so I settled back into admiring her work.
Next up, I stopped in to see Alix Christian's studio. I know her from Two Hands and I wanted to see her space. It was my favorite studio of all. The previous tenants were leather workers. They lined some of the walls with old, worn wood and Alix's husband made wonderful, shallow shelves to hold her framed pieces.
Alix's talent style has many different styles. I was very inspired by her kid-like pieces. I may create some art like hers with art my children made when they were young. Alix is very positive and inspiring. I hope to be able to take part in one of her open studios some day. It is a bit of a challenge for me since they take place on week days.
I also stopped by a shared printing studio and encountered a few artists that I know from going to Anderson Ranch. It was nice to have a chance to chat with them.
I was also very smitten with the art of printer, Theresa Haberkorn. I am very interested in trying out wood block carved prints. I love the personality in these pieces, especially the piglet pieces. She gave me permission to show the printing blocks and the prints.
Phil Lewis had the most beautiful, gallery like space and lots of interesting art. I enjoyed learning about how his artistic processes have evolved over the years. He was kind enough to allow me to show you in the photos below.
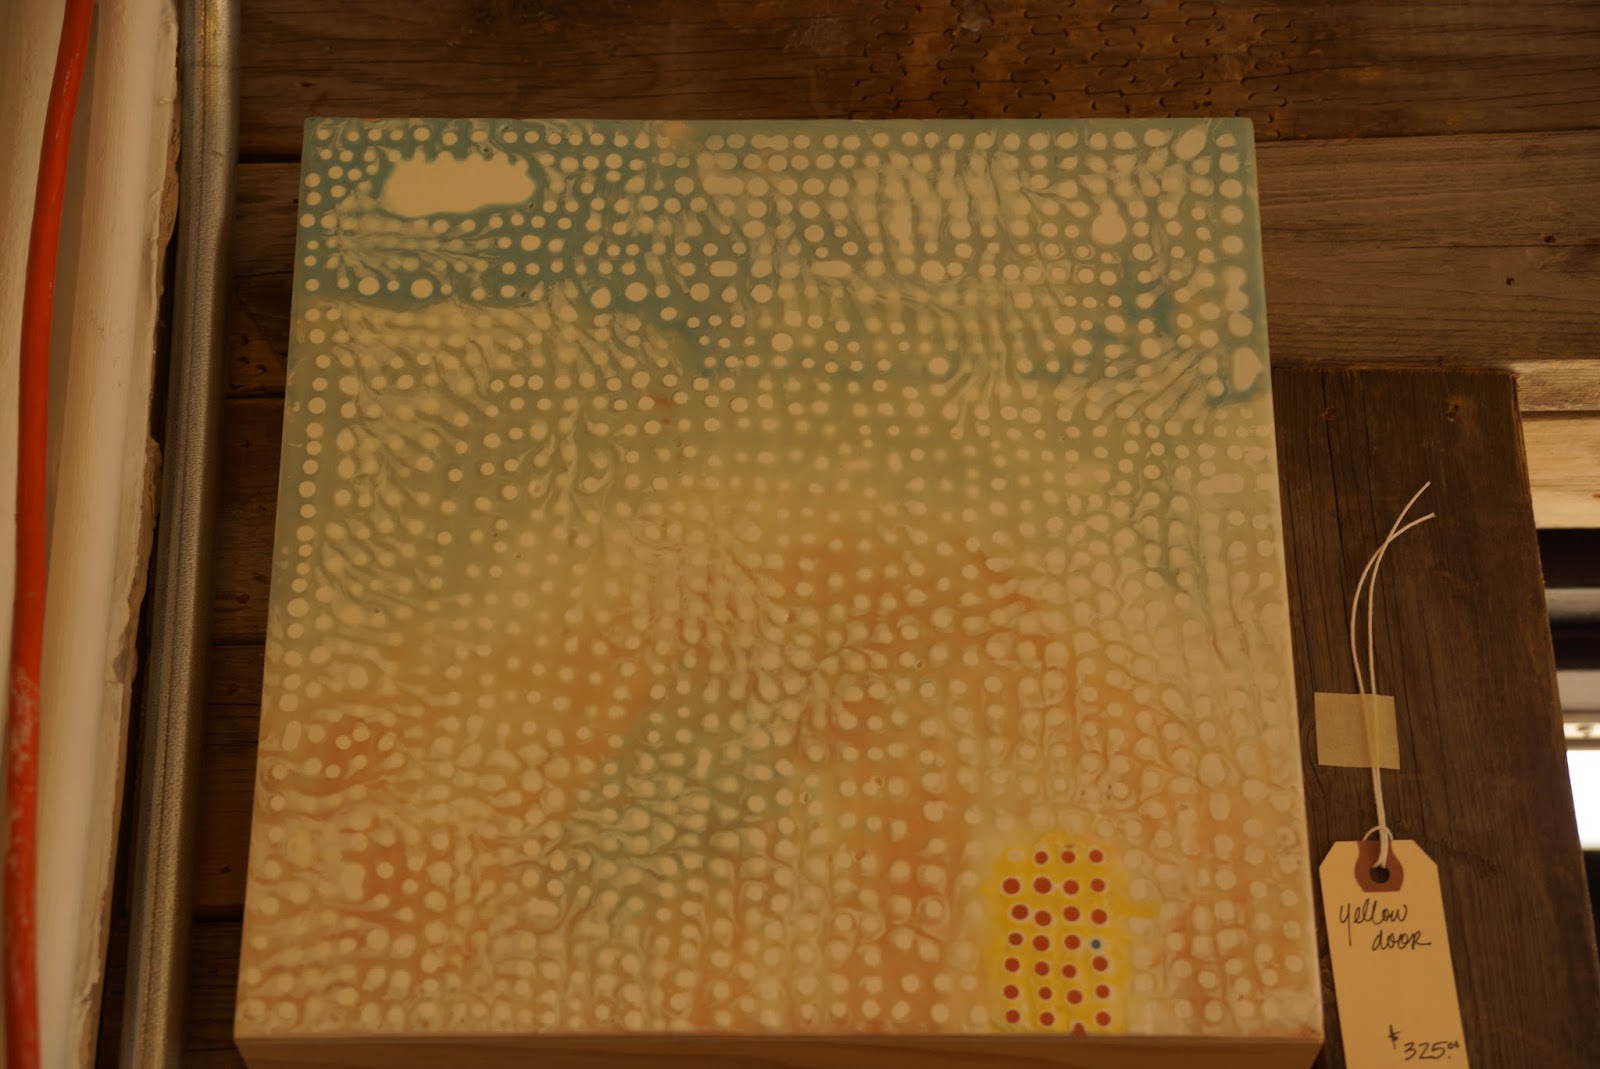
I picked my way through a intentionally created community to see the artwork of Lee Heekin. I would have liked to talk with her about her art, but she was not there. I am very intrigued by the encaustics that she creates. It appears that she makes the boxes and does a multi-layer wax pour. After it is cooled and set, she afixes a lightbulb into the back of the box. The idea is very thrilling to me.
The best surprise of the day came from meeting Molly Hargarten. She and I like so many of the same kinds of things and have such similar artistic interests that I could imagine that we might become friends. We talked about artistic processes and realizations that we have both made. I even asked her if she would like to get together and make art some time. She had many wonderful pieces, but the red-winged blackbirds were my favorite, hands down. After leaving her studio, I was so uplifted that I decided that was a good place to end my self-guided tour. There were at least 150 more studios I could have visited, but I was satisfied and ready to head home.
-----------------------
Cabbage Rolls
2 pound lean ground beef
1 large Red Onion, chopped
4 cloves garlic
2 pounds cabbage, chopped into bite size pieces (I use about 1/2 a med. head of cabbage, the weight is approximate)
2 tablespoons olive oil
4 cloves garlic, minced
1 can Tomatoes, Fire Roasted, Chopped (about 14 oz.)
¼ cup chopped parsley
1-2 TB Basil, dried
2 tablespoons lemon juice
½ teaspoon black pepper
Salt to taste
2 cup cooked rice
1 large pizza dough, or bread dough
Pre-heat oven to 425 degrees.
Heat a pan on medium heat and add ground beef until cooked. Drain off the fat. Remove and place in a bowl.
To the skillet add onions, garlic and olive oil and cook stirring for 5 minutes. Add in the cabbage and cook longer, until the cabbage begins to wilt. Add in tomatoes, parsley, basil, lemon juice, salt & pepper (if using) and stir well. Finally add cooked rice and the cooked ground beef.Stir well to mix.
Divide the dough into balls about the size of a racket ball. Roll each one out on a floured board. Place about 1/4 cup of the cabbage mixture in the center of the dough. Fold the dough over to make a pocket. Place seam side down on a cookie sheet lined with parchment paper or non-stick foil. Repeat until they are all constructed. Bake for about 25 minutes, or until golden brown. Brush the hot rolls with butter right after removing them from the oven.
These travel well. Sometimes I add a bit of Worchestershire sauce to the mix if it needs a bit of kick.
Showing posts with label Art. Show all posts
Monday, October 12, 2015
Friday, October 02, 2015
A Paper Boat Update
A while back I posted a photograph of the paper boat that I had started. The process has been slow, but steady. I think it is nearly done. I want to figure out how to add fairly lights to the masts.
Monday, August 10, 2015
Of Paper Ship Progress, Camping and a Bunch of Recipes for the week
Things have been a bit wild and busy, so I have not had time to post an update. Today is the first day of the school year, so this will be brief.
I've worked a lot on the paper tall ship. I wanted to create a design that highlighted several different decorative papers, and something that is eye-catching. Here's what I have so far. I've installed tiny LED lights, which means that the cabins light up. I love adding lights to my creations. The switch is hidden inside of the time building on the deck. It lifts up to give access to the interior space. I am even thinking about adding lights to the mast. When I floated that idea with my family, I got a very mixed reaction, so I am not sure. I thought it might make it more magical since it will be displayed in the winter when it gets dark pretty early. I am hoping to work on the yards and the sails today.
{Paper Ship in progress}
I also spent a lot of focused time putting together a workshop that I will teach next summer, but then the subject and age group changed, so I am back to needing to do a lot of planning, sourcing, etc. The new workshop will be a lot of fun, I just need to wrap my head around it and come up with some fun, funky and creative projects to go along with teaching art history to young kids.
I also spent some of the weekend camping with some of the families from AVS. One of the families owns part of a valley near Boulder and they have a summer house on part of the land. Remmie (the dog) and I were there from Saturday afternoon until lunch time on Sunday. It was wonderful to finally go camping. I have been wanting to go for the last two years, so it felt good to be out in the wild. I would have liked to have some of my family with me, but they simply were not available.
We did a lot of visiting and eating. The highlight of the camping trip was when we saw a Moose family (buck, cow and calf) just a short distance away from us. The buck kept running back and forth in the river. It seemed strange. We heard that there was a big cat in the area, so we guessed that the moose was trying to distract it so that the big cat would not attack the baby. Later in the evening I set up my tent near that area. I slept lightly that night, slightly worried that the moose would return, or that the big cat might show up. Neither one did, though I could hear some sort of rodents eating grass throughout the night.
{Camping}
The next morning Remmie and I spend a while sitting outside of the tent, being calm, quiet and watching the sun peak over the mountains. I brought along some of my art materials and had a few people add images to my social sketching books. I had hoped to do more art, but that just did not happen. I am hopeful and prepared like that a lot.
The first couple of weeks of the new school year is always super busy, so I prepped a lot of food for the week. Here's a few of the recipes I will be using:
Magic Custard Cake
via: White on Rice Couple
1/2 cup Butter, unsalted
2 cups Milk
4 Eggs, separated
4 drops White Vinegar
1 1/4 cups Powdered Sugar
1 TBL Water
1 cup Flour
1 tea Vanilla Extract
Powdered Sugar for dusting
Preheat your oven to 325°F.
Lightly butter a 8"x 8" baking dish.
Melt the butter and set aside to slightly cool.
Warm the milk to lukewarm and set aside.
Whip the egg whites and vinegar to stiff peaks. Set aside.
Beat the egg yolks and sugar until light. Mix in the melted butter and the tablespoon of water for about 2 minutes or until evenly incorporated.
Mix in the flour until evenly incorporated. Slowly beat in the milk and vanilla extract until everything is well mixed.
Fold in the egg whites, 1/3 at a time. Repeat until all of the egg whites are folded in.
Pour the batter into the prepared pan and bake for 45-60 minutes or until the top is golden. Allow cake to completely cool before cutting and then dust with confectioner's sugar *see Note 1.
Note 1: For faster cooling you can place the cake in the fridge. Even after fully cooled, it will still be slightly jiggly.
Recipe Source: WhiteOnRiceCouple.com.
* The kids really enjoyed this one, especially Kohlton. I liked the fact that it was not too sweet. I think I could leave off the powdered sugar topping and make it into a breakfast item.
------------
Cajun Style Grill Packets with Corn, Potatoes, Shrimp and Sausage
via: Favorite Family Recipes
8-12 pieces of corn on the cob (4 full cobs cut in half or in thirds)
4 red potatoes, washed and cubed
20-30 uncooked shrimp (peeled or not, it's up to you)
1 Lb. smoked sausage, cut into chunks
melted butter (or olive oil), to taste
1/2 c. chicken broth (you may not need that much)
Cajun/Creole seasoning (we like to use Tony Chachere's brand), to taste
salt and pepper, to taste
Instructions
(Makes 4 grill packets)
Heat grill to 400-degrees (you can do this in your oven, too, at the same temp.).
Evenly distribute corn, potatoes, shrimp, and sausage between 4 heavy-duty foil sheets (appx 12x18 inches each).
Drizzle melted butter and about 2 Tbsp. chicken broth over each foil packet.
Season evenly (and generously), to taste with Cajun seasoning and salt and pepper.
Tightly seal foil packets by folding up the sides over the contents and tightly folding up the ends over the seam.
Grill 30-40 minutes or until potatoes are tender, flipping once half-way through (be careful opening the packets to check for doneness, the steam inside is VERY hot)!
-----------
Stick of Butter Rice
via: Thirty Handmade Days blog
1 c. uncooked white rice (NOT instant)
1 (10 oz) can of Condensed French Onion Soup
1 (10 oz) can of Beef Broth
1/2 c. of butter, sliced
Preheat oven to 425 degrees.
In a 9x9 inch baking dish combine rice, soup and broth.
Cut butter into slices and place on top of the mixture.
Cover with foil and bake for 30 minutes.
Remove cover and bake 30 minutes more.
This can be doubled or tripled to feed more. Optional: small can of drained mushrooms can be added as well.
-----------
Lemon Fettuccine Alfredo with Grilled Chicken and Broccoli
via: Cooking Classy
Yield: About 6 servings
Ingredients
12 oz dry fettuccine pasta
1 lb boneless skinless chicken breasts, grilled and sliced into strips
4 cups broccoli florets (from 1 lb broccoli crowns)
2 Tbsp butter
2 cloves garlic, minced
3 Tbsp flour
1 3/4 cups milk (preferably 1%)
Salt and freshly ground black pepper
3 oz. light or regular cream cheese, diced into cubes
1/2 cup (1.5 oz) finely shredded parmesan, plus more for serving
3 Tbsp heavy cream
1 Tbsp lemon zest, plus more for serving
1 Tbsp fresh lemon juice
Prepare pasta in salted water according to directions listed on package, adding in broccoli during last 5 minutes of boiling pasta (so they will both boil together during last 5 minutes, then drain them together. Reserve 1/4 cup pasta water just in case you want to thin sauce, I didn't use it but I always save some just in case).
In a large and deep skillet or pot, melt butter over medium heat then add in garlic and flour and cook 1 minute, stirring constantly. While whisking slowly pour milk into flour mixture, then cook, whisking vigorously to smooth lumps until mixture begins to thicken. Add in cream cheese and parmesan and whisk until melted (it will look lumpy at first but will begin to smooth). Mix in cream and season with salt and pepper to taste (I liked this with a fair amount of pepper). Stir in lemon zest and lemon juice.
Toss drained pasta and broccoli into sauce mixture along with chicken (thin with reserved pasta water if needed). Serve warm topped with additional parmesan, lemon zest and pepper as desired.
Recipe source: Cooking Classy, inspired by my Light Fettuccine Alfredo
-----------
Chicken Tikka Masala
via: All Recipes
1-1/2 cups yogurt
1 tablespoon and 1-1/2 teaspoons lemon juice
1 tablespoon ground cumin
1-1/2 teaspoons ground cinnamon (or garam masala)
1 tablespoon cayenne pepper
1 tablespoon freshly ground black pepper
1 tablespoon and 1-1/2 teaspoons minced fresh ginger
1/2 tablespoons salt, or to taste (adjusted)
4-1/2 boneless skinless chicken breasts, cut into bite-size pieces
6 long skewers
1 tablespoon and 1-1/2 teaspoons butter
1-1/2 - 3 cloves garlic, minced
1-1/2 jalapeno pepper, finely chopped
1 tablespoon ground cumin
1 tablespoon paprika
1 tablespoon and 1-1/2 teaspoons salt, or to taste
1-1/2 (8 ounce) cans tomato sauce
1-1/2 cups heavy cream
1/4 cup and 2 tablespoons chopped fresh cilantro
In a large bowl, combine yogurt, lemon juice, 2 teaspoons cumin, cinnamon, cayenne, black pepper, ginger, and 4 teaspoons salt. Stir in chicken, cover, and refrigerate for 1 hour.
Preheat a grill for high heat.
Lightly oil the grill grate. Thread chicken onto skewers, and discard marinade. Grill until juices run clear, about 5 minutes on each side.
Melt butter in a large heavy skillet over medium heat. Saute garlic and jalapeno for 1 minute. Season with 2 teaspoons cumin, paprika, and 3 teaspoons salt. Stir in tomato sauce and cream. Simmer on low heat until sauce thickens, about 20 minutes. Add grilled chicken, and simmer for 10 minutes. Transfer to a serving platter, and garnish with fresh cilantro.
Honey Glazed Salmon
via: Damn Delicious
4 salmon filets
Kosher salt and freshly ground black pepper, to taste
4 tablespoons all-purpose flour
4 tablespoons honey
2 tablespoons olive oil
Zest of 1 lime
FOR THE BROWNED BUTTER LIME SAUCE
6 tablespoons unsalted butter
2 cloves garlic, pressed
1 tablespoon honey
Juice of 1 lime
Kosher salt and freshly ground black pepper, to taste
Preheat oven to 400 degrees F.
To make the browned butter lime sauce, melt butter in a medium saucepan over medium heat. Cook, whisking constantly, until the foam subsides and the butter begins to turn a golden brown, about 3 minutes. Stir in garlic, honey and lime juice, salt and pepper, to taste; set aside.
Season salmon with salt and pepper, to taste. Dredge each salmon filet with 1 tablespoon flour and drizzle with 1 tablespoon honey.
Heat olive oil in a large oven-proof skillet over medium high heat. Working in batches, add salmon to the skillet and sear both sides until golden brown, about 1-2 minutes per side.
Place into oven and bake until completely cooked through, about 8-10 minutes.
Serve immediately with browned butter lime sauce and lime zest, if desired.
Wednesday, August 05, 2015
Cardboard Shipwright + Korean Style Pork Chops & Pork Carnitas
I am so excited to tell you that I am creating the Two Hands Paperie holiday window display and I am super excited. I feel so thankful and fortunate for this opportunity. IT will be a fantastical night sky with a tall ship, a castle on a cloud and a 1915 style man on the moon. Each of those main pieces will light up. There will also be tons of stars and maybe more clouds. Although it will not be hung until November 22, I am working on the hard, intricate parts now. I love making things with paper; I always have.
Right now I am building the ship. It is slow, but fun. There are not any patterns or books that tell you exactly how to make them, so I am figuring it out as I go. I am very inspired by the handmade boats that Ann Wood creates. I bought the book she wrote, and considered her advice, but what I want is more complex, so the patterns that she sells did not work for my purpose. Here's an example of her lovely work:
{This boat was created by Ann Wood.}
I was going to make my ship out of wire, but I could not get the wire to behave in the way that I wanted it to. After a lot of fusing and thinking about the wire idea, I ditched it and went with cardboard. It is much more familiar for me to work with. It took me about two days to fashion the skeleton as I had to think a lot about proportions, flow and strength. I want the ship to be pretty. I want it to hang gracefully and I want it to last. I don't want it to sag. Thus, I put in a lot of support, especially for the masts.
I made the deck as a separate piece to allow for adjusting or changing out the lights. I am employing a 4' string of tiny LED lights that are powered by watch batteries. This means that you need to have access to the battery part to change them out. To accomplish this, I built a tiny house like structure (that would be the way you get into the belly of the ship) that can be lifted off to gain access to the batteries.
I also made the deck slightly raised so that it does not sit directly on the lights. I also covered the windows with clear plastic (cut from packaging) and then a layer of yellow tissue paper to diffuse the light. Without the tissue paper you ca see the wire and the lights, which is not the look I am going for.
t
The next challenge, which I am working on now, is to create a skin for the hull. I have applied strips of paper that are hot glued and taped in place. This surface will be covered with the decorative papers. I am just trying to figure out the best way to do this. Should I create a paper mache surface first? Will several coats of Modge Podge be the right product? I am going to have to think about this a bit more, though not too long. I would really like to get this piece done before I return to teaching on Monday.
I love these kinds of challenges. They are a sort of puzzle to me. I told my kids that I maybe in my next life I could be part of the teams that make the model building or bigatures for the movies. They replied that they are tired of my putting my dreams on hold and that I should go for it. I reminded them that I would have to live someplace like Hollywood in order to make those. They said that it is time for me to find a way for me to make those dreams happen, even if it is not in Hollywood, that perhaps I could make the stuff and sell it. It is wonderful that they are so supportive. I think they have the idea that I have put all of my dreams on hold while they were little. I reminded them that being a mom was a dream of mine, too, and that raising them is a wonderful thing. I reminded them that we can have many dreams. I am thankful that my family is so supportive of the art I do.
Now, I need to get back to figuring out the proper way to decorate the hull.
-------------
Korean Style Pork Chops
via: Jo Cooks
4 pork chops
1 tbsp olive oil
¼ cup soy sauce, low sodium
2 tbsp honey
4 cloves garlic, minced
1 tsp sesame oil
1 tsp ginger, minced
2 tsp sriracha sauce
black pepper to taste
Preheat oven to 400 F degrees.
In a medium size bowl whisk together the soy sauce, honey, garlic, ginger, sesame oil and sriracha sauce. Pour over pork chops and let marinade for about 20 minutes.
Heat the olive oil in a large skillet for medium high heat. Add pork chops, without marinade, and cook for about 5 minutes for the first side, or until it gets a nice brownish color. Flip the pork chops and pour the remaining marinade over them. Cook another 5 min on this side.
Place the skillet in the oven to finish cooking them. Roast for about 10 minutes, or until pork chops are completely cooked through.
---------
Pork Carnitas
via: My Kitchen Escapades
(recipe adapted from Cooks Illustrated)
4 pound boneless pork butt, fat trimmed and cut into 2 inch cubes
1 1/2 tsp salt
3/4 tsp pepper
1 tsp ground cumin
1 onion, peeled and halved
2 bay leaves
1 tsp dried oregano
2 Tb fresh lime juice
2 C water
1 medium orange, juiced and keep the spent halves
1. Adjust oven rack to lower middle position and heat to 300 degrees. Combine all the ingredients in a large Dutch oven, (this is my favorite one!) including the spent orange halves and juice. Bring the mixture to a simmer over medium-high heat, uncovered. Once it simmers, cover pot and transfer it to the oven. Cook until the meat falls apart when prodded with a fork, about 2 hours.
2. Remove the pot from the oven and turn on the broiler. Use a slotted spoon to remove the meat from the pan and place it on a large foil-lined jelly roll pan. Remove and discard everything from the pot except for the cooking liquid. Place pot over high heat on the stove and boil until thick and syrupy, about 20 minutes. You should have about 1 C of liquid remaining when it is finished.
3. While the liquid is reducing, use two forks to pull each cube of pork into three equal sized pieces. Once the liquid has become a syrup, gently fold in the pieces of pork into the pot. Try not to break up the pork any further. Taste and add additional salt and pepper.
4. Spread the pork back onto the foil lined pan and evenly spread the meat around so there is a single layer of meat. Place the jelly roll pan on the lower middle rack of the oven and broil until the top of the meat is well browned and edges are slightly crisp, about 5 to 8 minutes. Using a wide metal spatula, flip the pieces of meat and broil the other side until well browned and edges are slightly crisp, 5 to 8 minutes. Serve immediately in a tortilla with all your favorite toppings.
Right now I am building the ship. It is slow, but fun. There are not any patterns or books that tell you exactly how to make them, so I am figuring it out as I go. I am very inspired by the handmade boats that Ann Wood creates. I bought the book she wrote, and considered her advice, but what I want is more complex, so the patterns that she sells did not work for my purpose. Here's an example of her lovely work:
I was going to make my ship out of wire, but I could not get the wire to behave in the way that I wanted it to. After a lot of fusing and thinking about the wire idea, I ditched it and went with cardboard. It is much more familiar for me to work with. It took me about two days to fashion the skeleton as I had to think a lot about proportions, flow and strength. I want the ship to be pretty. I want it to hang gracefully and I want it to last. I don't want it to sag. Thus, I put in a lot of support, especially for the masts.
I made the deck as a separate piece to allow for adjusting or changing out the lights. I am employing a 4' string of tiny LED lights that are powered by watch batteries. This means that you need to have access to the battery part to change them out. To accomplish this, I built a tiny house like structure (that would be the way you get into the belly of the ship) that can be lifted off to gain access to the batteries.
I also made the deck slightly raised so that it does not sit directly on the lights. I also covered the windows with clear plastic (cut from packaging) and then a layer of yellow tissue paper to diffuse the light. Without the tissue paper you ca see the wire and the lights, which is not the look I am going for.
t
The next challenge, which I am working on now, is to create a skin for the hull. I have applied strips of paper that are hot glued and taped in place. This surface will be covered with the decorative papers. I am just trying to figure out the best way to do this. Should I create a paper mache surface first? Will several coats of Modge Podge be the right product? I am going to have to think about this a bit more, though not too long. I would really like to get this piece done before I return to teaching on Monday.
I love these kinds of challenges. They are a sort of puzzle to me. I told my kids that I maybe in my next life I could be part of the teams that make the model building or bigatures for the movies. They replied that they are tired of my putting my dreams on hold and that I should go for it. I reminded them that I would have to live someplace like Hollywood in order to make those. They said that it is time for me to find a way for me to make those dreams happen, even if it is not in Hollywood, that perhaps I could make the stuff and sell it. It is wonderful that they are so supportive. I think they have the idea that I have put all of my dreams on hold while they were little. I reminded them that being a mom was a dream of mine, too, and that raising them is a wonderful thing. I reminded them that we can have many dreams. I am thankful that my family is so supportive of the art I do.
Now, I need to get back to figuring out the proper way to decorate the hull.
-------------
Korean Style Pork Chops
via: Jo Cooks
4 pork chops
1 tbsp olive oil
¼ cup soy sauce, low sodium
2 tbsp honey
4 cloves garlic, minced
1 tsp sesame oil
1 tsp ginger, minced
2 tsp sriracha sauce
black pepper to taste
Preheat oven to 400 F degrees.
In a medium size bowl whisk together the soy sauce, honey, garlic, ginger, sesame oil and sriracha sauce. Pour over pork chops and let marinade for about 20 minutes.
Heat the olive oil in a large skillet for medium high heat. Add pork chops, without marinade, and cook for about 5 minutes for the first side, or until it gets a nice brownish color. Flip the pork chops and pour the remaining marinade over them. Cook another 5 min on this side.
Place the skillet in the oven to finish cooking them. Roast for about 10 minutes, or until pork chops are completely cooked through.
---------
Pork Carnitas
via: My Kitchen Escapades
(recipe adapted from Cooks Illustrated)
4 pound boneless pork butt, fat trimmed and cut into 2 inch cubes
1 1/2 tsp salt
3/4 tsp pepper
1 tsp ground cumin
1 onion, peeled and halved
2 bay leaves
1 tsp dried oregano
2 Tb fresh lime juice
2 C water
1 medium orange, juiced and keep the spent halves
1. Adjust oven rack to lower middle position and heat to 300 degrees. Combine all the ingredients in a large Dutch oven, (this is my favorite one!) including the spent orange halves and juice. Bring the mixture to a simmer over medium-high heat, uncovered. Once it simmers, cover pot and transfer it to the oven. Cook until the meat falls apart when prodded with a fork, about 2 hours.
2. Remove the pot from the oven and turn on the broiler. Use a slotted spoon to remove the meat from the pan and place it on a large foil-lined jelly roll pan. Remove and discard everything from the pot except for the cooking liquid. Place pot over high heat on the stove and boil until thick and syrupy, about 20 minutes. You should have about 1 C of liquid remaining when it is finished.
3. While the liquid is reducing, use two forks to pull each cube of pork into three equal sized pieces. Once the liquid has become a syrup, gently fold in the pieces of pork into the pot. Try not to break up the pork any further. Taste and add additional salt and pepper.
4. Spread the pork back onto the foil lined pan and evenly spread the meat around so there is a single layer of meat. Place the jelly roll pan on the lower middle rack of the oven and broil until the top of the meat is well browned and edges are slightly crisp, about 5 to 8 minutes. Using a wide metal spatula, flip the pieces of meat and broil the other side until well browned and edges are slightly crisp, 5 to 8 minutes. Serve immediately in a tortilla with all your favorite toppings.
Wednesday, July 29, 2015
A Few of My Favorite Mountain Ranges + Thai Chicken Salad Recipe
I recently spent three days painting a mural of some of my favorite Colorado mountain ranges on the wall in the main room at Alpine Valley School.
The mural reminds me of the mountains that my father painted in my room in his house when I was little. I thought a lot about that while I was painting. I am thankful for being able to paint murals. It is really pretty gratifying to be able to create art.
Here's what it looks like:
I began by picking out images of the Colorado mountain ranges that I love. I did this, instead of just drawing random mountain-like shapes, because it helped me keep them looking realistic and to scale. After I created the image, I put superimposed a grid over it to ensure the right proportions when I drew the image on the wall. Next, I painted the top or back ranges. This was so that I would be able to easily paint over any drips that occurred.
Next, I painted in the finer edges on the top and bottom of the middle ranges of mountains. I did this so that the harder work would be done in the event that someone else wanted to paint along side of me. I also painted over the grid marks I made on the wall from when I drew the images on the wall.
I then painted them. From time to time I would also add in some clouds. I painted the clouds in small spurts as it was not so easy to stand on the foot stool I had and reach up as high as I could extend my arm and brush to paint the clouds.
I also went back over the top mountain range, touching up the paint where it was needed, as I would do with the other layers.
Now it is nearly done. I just have a few more clouds to add in.
I am curious to see if they will want the mountain ranges to expand onto another wall. When I posted the final image on Facebook, lots of people "liked" and commented on it. I hope it helps make the school feel just a bit more special.
--------
Here's a nice dinner salad that we enjoyed:
Thai Chicken Salad
via: My Kitchen Escapades
(recipe adapted from Taste and Tell)
serves 8
Chicken marinade
1/2 C vegetable oil
2 Tb rice vinegar
1/4 C sugar or 2 Tb Truvia
1 clove garlic, minced
1/2 bunch cilantro, chopped
1 lime, juiced
dash of salt and pepper
4 boneless, skinless chicken breasts – about 2 1/2 pounds total
Salad
2 hearts of romaine, chopped
1/2 large head of napa cabbage, chopped
1 cucumber, peeled, seeded and chopped
2 carrots, shredded
1 red bell pepper, chopped
5 green onions, chopped
1/2 bunch of cilantro, chopped
1 C salted peanuts
Dressing
1/4 C rice vinegar
1/4 C Thai sweet red chili sauce
1 tsp sesame oil
1/2 tsp sugar or Truvia
pinch of salt and pepper
Peanut Sauce
1/4 C natural peanut butter
2 Tb soy sauce
1 Tb rice vinegar
1 Tb Thai sweet red chili sauce
2 Tb water
1. In a ziplock bag, combine all the ingredients for the chicken marinade. Mush it all around, then place it in the fridge for at least 4 hours to marinade. Cook the chicken either on a hot grill, 6-8 minutes a side or in a 350 degree oven for 40 minutes. Allow it to cool a bit, then chop up all the chicken into bite sized pieces.
2. Combine all the salad ingredients in a large bowl, except for the peanuts, then add the chicken. Combine all the dressing ingredients then pour over the salad. Toss until the salad is evenly coated with the dressing. Dish out the individual servings of the salad.
3. Stir together the ingredients for the peanut sauce in a small bowl. If the sauce is too thick to drizzle, add a bit more water. Generously drizzle the peanut sauce over each serving of salad then top with the peanuts.
Subscribe to:
Posts (Atom)